안녕하세요. 육아개발아빠입니다.
지금은 개발아빠로 변신하여 포스팅을 해봅니다.
개발아빠가 밥벌이 하고 있는건 '안드로이드' 인데, 최근 가장 관심가고 있는 것은 'Flutter' 입니다.
Flutter는 안드로이드,아이폰, 웹 심지어 Mac Os 앱, 그리고 최근에는 Window Os 앱 까지 개발이 가능한
Cross Platform Development Framework입니다.
아마 클라이언트 개발자라면 많이들 들어보셨을 단어라고 생각하며, Flutter와 관련되어 앞으로 포스팅 할 예정입니다.
서론이 길었네요~
오늘 알아볼 내용은 Router를 활용하여 화면을 이동하는 방법에 대해 소개해보려고합니다.
Flutter의 모든것은 Widget이라는 단위로 되어있습니다.
기본적으로 Flutter 프로젝트를 시작해서 나오는 샘플 코드에서도 보면 아래와 같이 나옵니다.
void main() {
  runApp(MyApp());
}

class MyApp extends StatelessWidget {
  // This widget is the root of your application.
  @override
  Widget build(BuildContext context) {
    return MaterialApp(
      title: 'Flutter Demo',
      theme: ThemeData(
        primarySwatch: Colors.blue,
        visualDensity: VisualDensity.adaptivePlatformDensity,
      ),
      home: EntrancePage(),
    );
  }
}
MyApp 은 StatelesssWidget 을 상속받고 있고, 즉 MyApp 자체가 하나의 Widget 입니다. (// This widget is the root of your application.)
네 맞습니다. Flutter는 모든 것이 Widget단위입니다. 전체 App 단위도, 작은 Text 하나도..
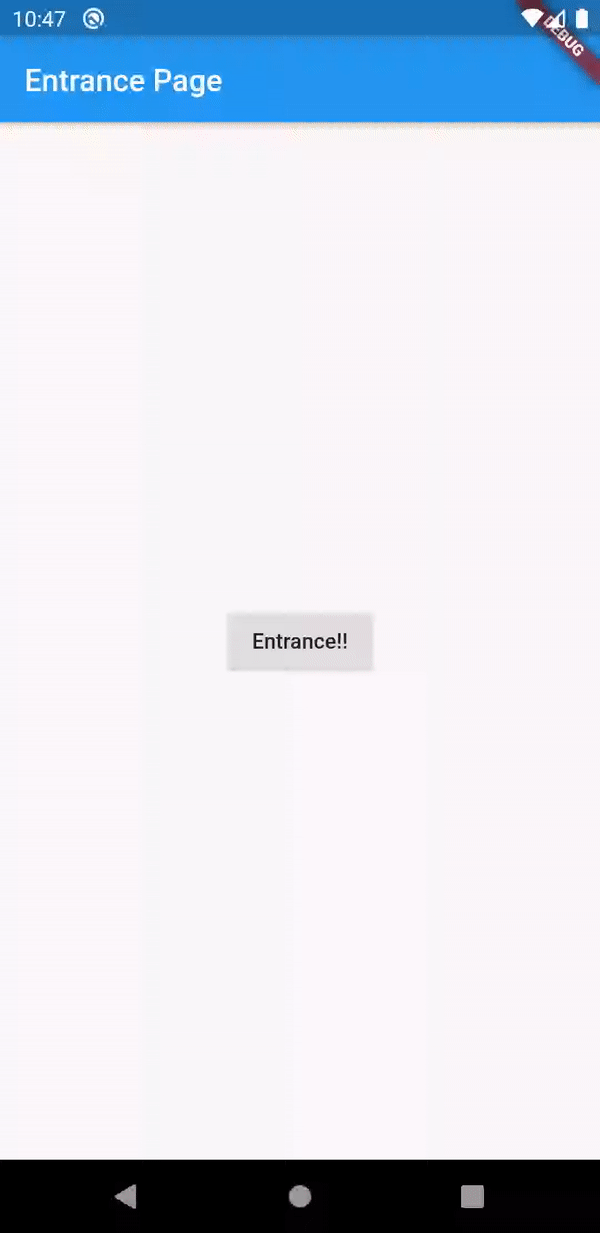
여기서 화면 두개를 만들어 보겠습니다.
이것을 집 이라고 가정을 하고 입구와 출구를 만들어보겠습니다.
class EntrancePage extends StatelessWidget {
  @override
  Widget build(BuildContext context) {
    return Scaffold(
      appBar: AppBar(
        title: Text('Entrance Page'),
      ),
      body: Container(
        child: Center(
          child: RaisedButton(
            child: Text('Entrance!!'),
            onPressed: () {

              },
            ),
          ),
        ),
      );
  }
}
class ExitPage extends StatelessWidget {
@override
Widget build(BuildContext context) {
return Scaffold(
appBar: AppBar(
title: Text('Exit Page'),
),
body: Container(
child: Center(
child: RaisedButton(
child: Text('Exit!!'),
onPressed: () {
},
),
),
),
);
}
}여기에 문만 달고 손잡이는 안달았네요~
onPressed: () {
              Navigator.push(context,
                  MaterialPageRoute(builder: (context) => 원하는페이지()));
              },
            ),
이렇게 넣으면 손잡이를 달아서~
자 이제 끝!! 아닌가요. 이동하는거 다 했어요~ 라고 하면 저도 이제 이 작은 집을 탈피 해야 하잖아요!
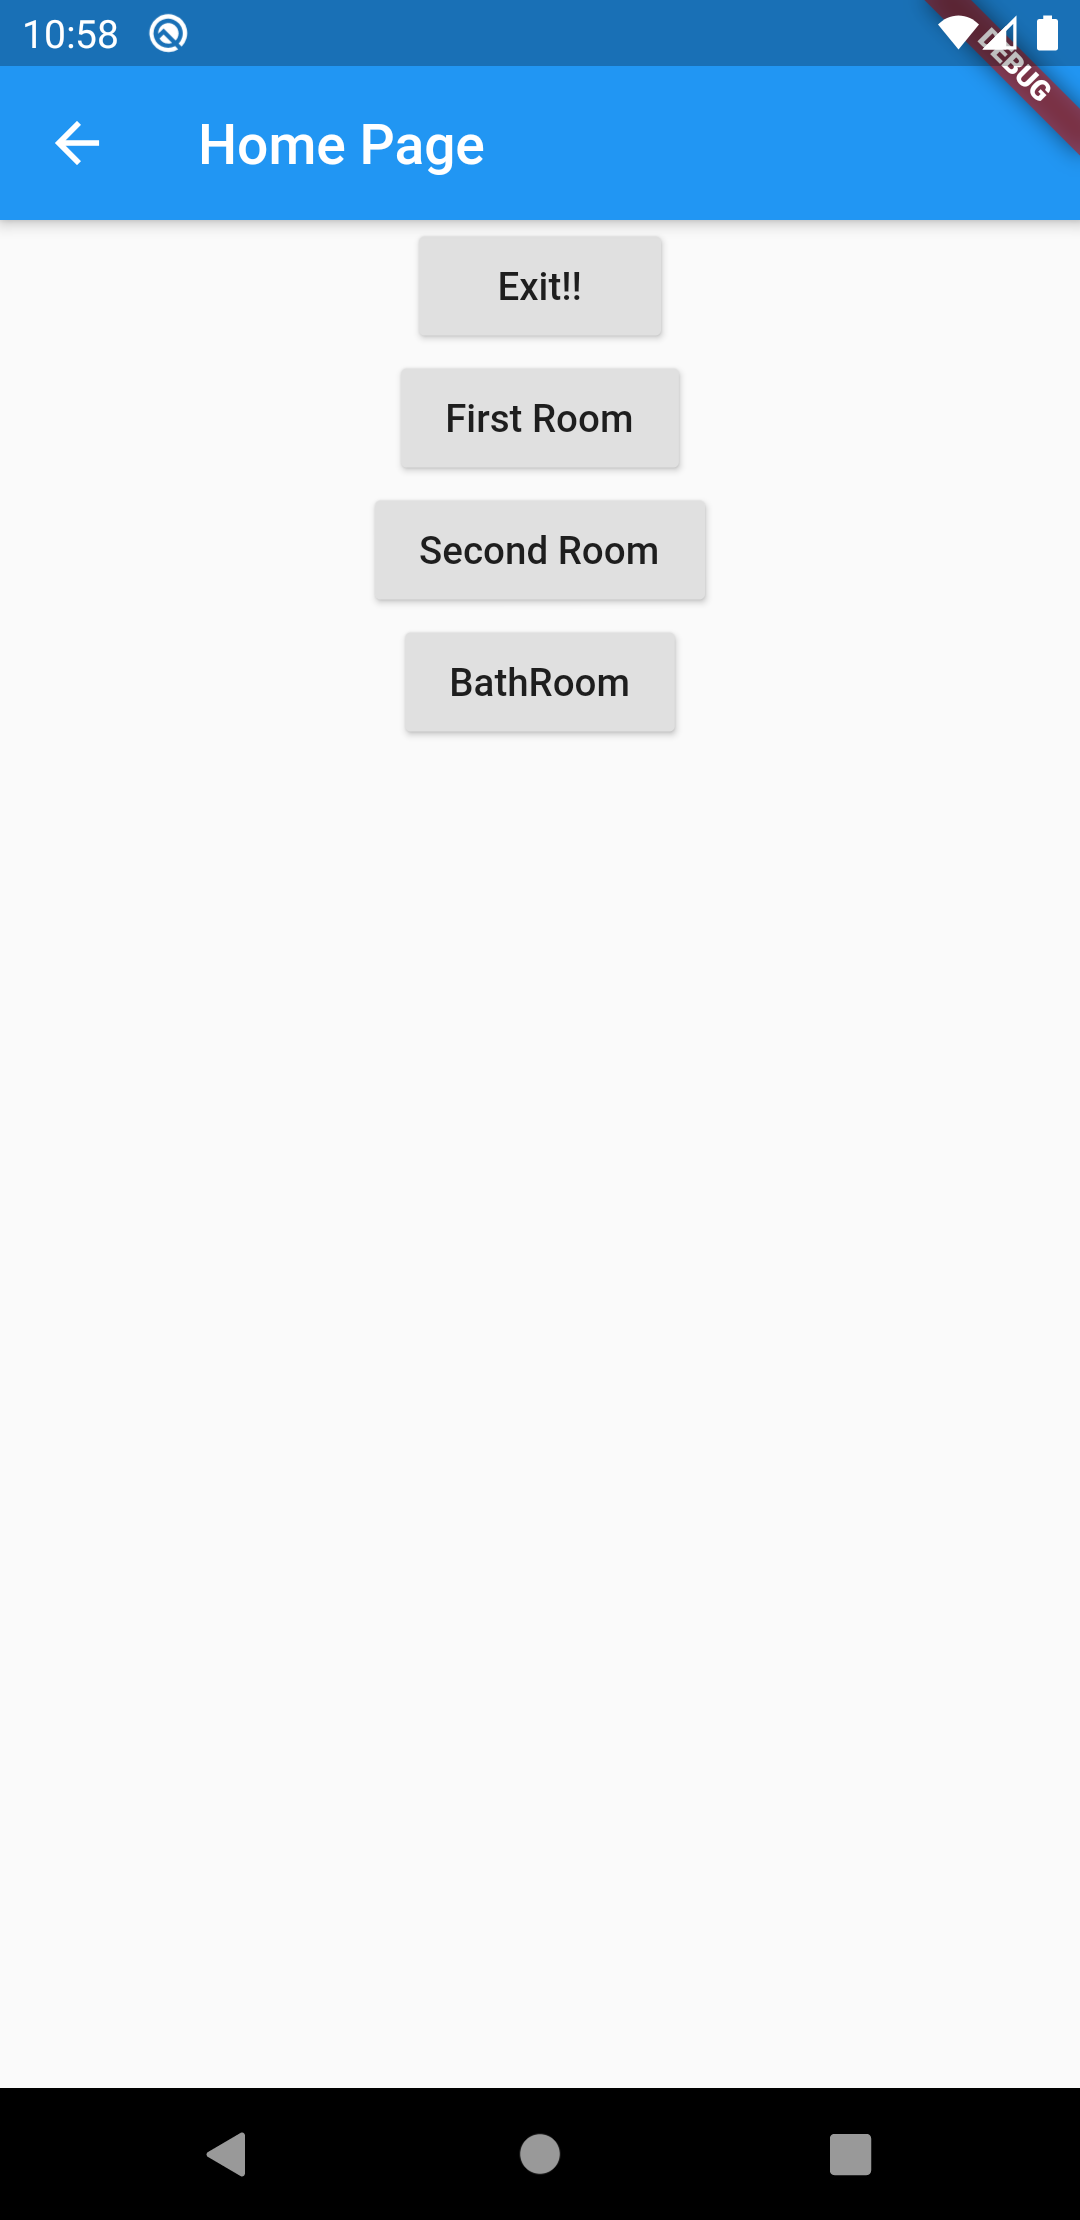
여러분 제 새집입니다! 아까는 출구만 있던 곳에서 이제 첫 번째 방, 두번째 방, 화장실도 생겼어요~
여기서도 똑같이 문을 달려면 아래와 같이 하면 되겠죠?
RaisedButton(
	child: Text('Exit!!'),
    onPressed: () {
    	Navigator.push(context,
    	MaterialPageRoute(builder: (context) => EntrancePage()));
    },
),
RaisedButton(
	child: Text('First Room'),
    onPressed: () {
    	Navigator.push(context,
    	MaterialPageRoute(builder: (context) => FirstRoom()));
    },
),
RaisedButton(
	child: Text('Second Room'),
    onPressed: () {
    	Navigator.push(context,
    	MaterialPageRoute(builder: (context) => SecondRoom()));
    },
),
RaisedButton(
	child: Text('BathRoom'),
    onPressed: () {
    	Navigator.push(context,
    	MaterialPageRoute(builder: (context) => BathRoom()));
    },
),
이렇게 해도 이동 할 수는 있지만 몬가 되게 반복적 작업을 하는거 처럼 보이네요.
저도 이제 돈 좀 벌었으니 문을 관리하는 집사를 두도록 할께요~
root 프로젝트에 lib/아래에 routes.dart 파일을 만들어요.
그리고 여기에 제 문을 관리하는 집사인 Routes 클래스를 만들어서 아래와 같이 만들어요!
class Routes {
  Routes._();

  static const String firstRoom = '/firstRoom';
  static const String secondRoom = '/secondRoom';
  static const String bathRoom = '/bathRoom';
  static const String exit = '/exit';

  static final routes = <String, WidgetBuilder>{
    firstRoom: (BuildContext context) => FirstRoom(),
    secondRoom: (BuildContext context) => SecondRoom(),
    bathRoom: (BuildContext context) => BathRoom(),
    exit: (BuildContext context) => ExitPage(),
  };
}
그리고 집사 Routes는 MeterialApp에 routes: Routes.routes, 에 배치해주세요.
return MaterialApp(
      title: 'Flutter Demo',
      routes: Routes.routes,
      theme: ThemeData(
        primarySwatch: Colors.blue,
      ),
      home: EntrancePage(),
    );
  }
그리고 문들을 집사가 관리 할 수있게 조금 바꿔볼께요!
RaisedButton(
   child: Text('Exit!!'),
   onPressed: () {
   		Navigator.of(context).pushNamed(Routes.exit);
   },
),
RaisedButton(
   child: Text('First Room'),
   onPressed: () {
   		Navigator.of(context).pushNamed(Routes.firstRoom);
   },
),
RaisedButton(
   child: Text('Second Room'),
   onPressed: () {
   		Navigator.of(context).pushNamed(Routes.secondRoom);
   },
),
RaisedButton(
   child: Text('BathRoom'),
   onPressed: () {
   		Navigator.of(context).pushNamed(Routes.bathRoom);
   },
),
몬지 모르게 간결해진 느낌이 나네요!
근데 문은 작동안하는게 아닌지...
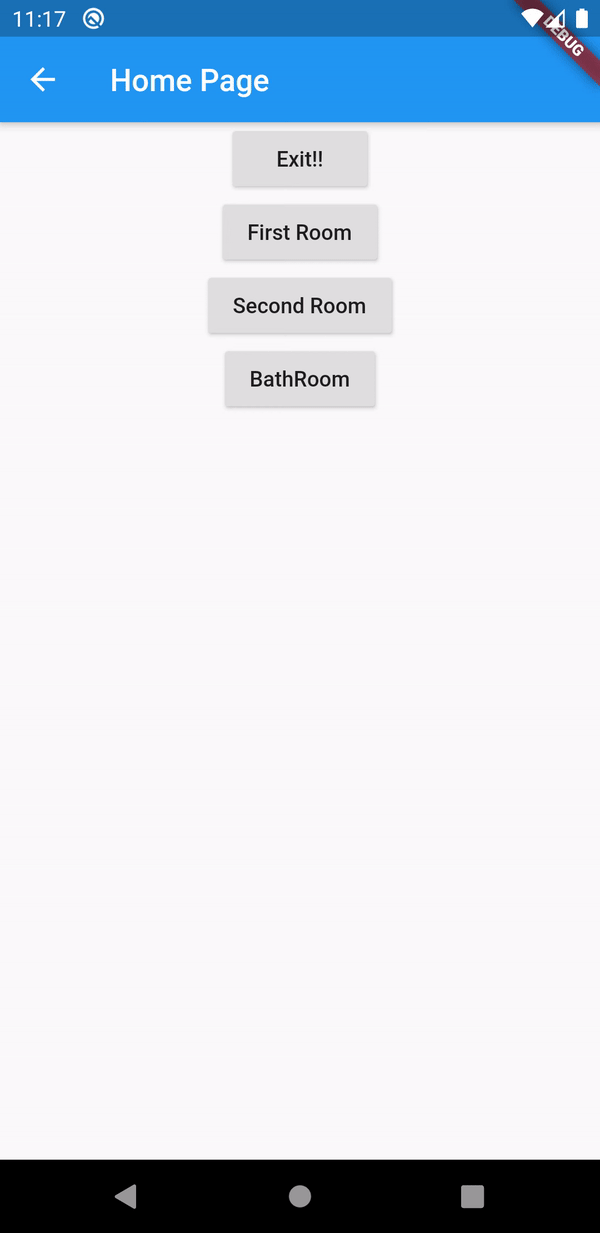
집사가 믿음직스럽군요~
참고로 방을 나갈때는
Navigator.of(context).pop(); 해주시면 됩니다.
페이지가 적을때는 모르겠지만 이제 페이지가 많아 질때는 집사 Routes를 사용해보세요. 훨씬 깔끔하게 관리가 될 꺼에요!
오늘 포스팅은 이상입니다.
혹시 이해가 안되시거나 잘못된 내용 있으면 댓글로 소통할께요!
'개발아빠 > Flutter' 카테고리의 다른 글
| 플러터(Flutter)로 화폐 단위 표현하기 / Currency Format (1) | 2020.10.20 |
|---|---|
| 플러터(Flutter) 네이티브앱과 Web에서 웹뷰 처리하기 (1) | 2020.10.12 |
| 플러터(Flutter) WebView 사용 및 History 제어 기능 추가 (2) | 2020.10.07 |
| 플러터(Flutter) 플랫폼 구분하기 (Android, iOS, Web) (0) | 2020.10.01 |
| 플러터(Flutter) 화면 이동 시 데이터 넘기기 (0) | 2020.09.29 |